
Paper Circuit Art Card
Source: Stemoto Original
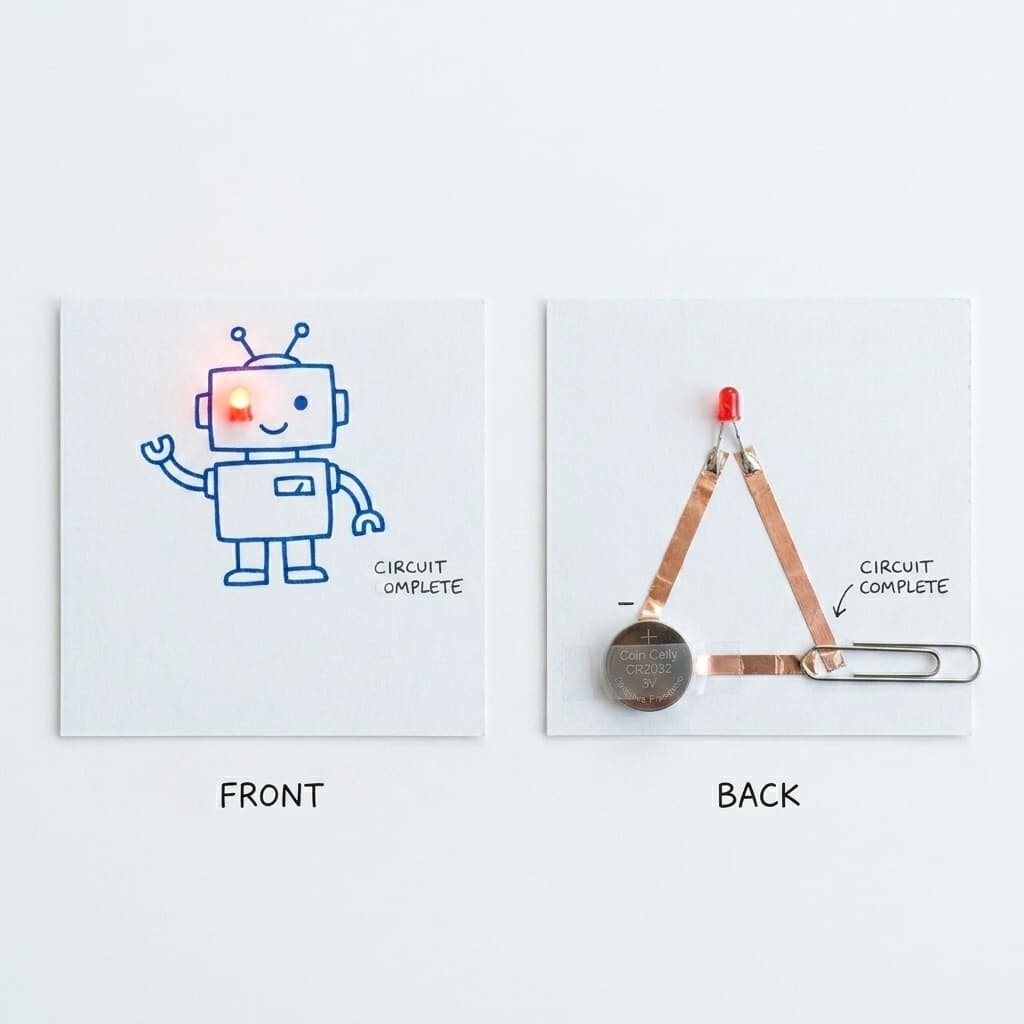
Create an electrifying greeting card or art piece using copper tape, a coin cell battery, and a small LED. This no-solder project introduces the basics of closed electrical circuits in a creative, safe, and highly visual way.
Categorisation
Props & Materials Required
- •Copper tape (conductive adhesive)
- •3V Coin cell battery (CR2032)
- •5mm LED light (any color)
- •Cardstock or thick paper
- •Clear tape or a small binder clip
- •Markers, crayons, or printed outlines for decoration
Step-by-Step Instructions
Design Your Art
Draw a picture on your cardstock. Decide where you want the light to shine through (e.g., a robot's eye, a star in the sky). Poke a small hole through the paper at that spot.
Lay the Track
On the back of the paper, map out where your battery will sit in the corner. Draw two pencil lines from the battery location to the hole you poked. Lay down the copper tape over these lines. Make sure the two strips of tape do not touch each other!
Attach the LED
Push the legs of the LED through the hole from the front to the back. Bend the legs flat against the copper tape. Important: LEDs have polarity! Tape the longer leg (positive) to one strip of copper tape, and the shorter leg (negative) to the other strip using clear tape.
Add the Power
Place the coin cell battery at the end of the tape tracks. Ensure the positive (+) side of the battery touches the copper track connected to the positive LED leg, and the negative side touches the negative track.
Make the Switch
Fold the corner of the paper so that the top copper track presses down onto the top of the battery, closing the loop. Use a binder clip to hold it in place and keep the light on!
Why It Works & Notes
This activity bridges art and science. By using copper tape instead of wires, kids physically draw the electrical path. They learn firsthand about conductivity, polarity (the long/short legs of the LED), and how switches work by simply folding paper over the battery to complete the circuit.
Very safe, no-solder project. Ensure children understand that the positive leg of the LED must connect to the positive side of the battery. AI Optional: You can use AI image generators to print cool outlines for kids to color and light up!